|
Copying TO a Floppy Disk | |
|
Copying FROM a Floppy Disk | |
|
Some Important Notes |
![]()
|
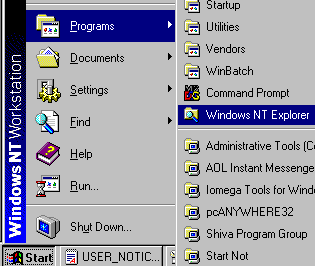
1. Launch Windows Explorer by one of the following 2 methods: |
|||
. If you have a Windows Explorer icon on your desktop, double-click the Windows Explorer Icon or |
|
||
. Select Start / Programs / Windows Explorer |
|
||
|
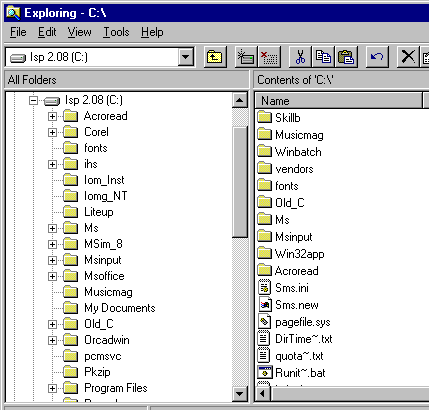
2. The Windows Explorer Screen will Open |
|||
|
|
||
|
|||
|
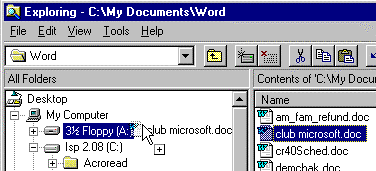
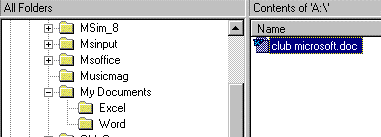
3. Navigate down through the folders and select the file you want to copy. |
|||
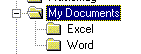
. If we are looking for a file in the My Documents directory, we click on the plus (+) sign to see what is below. The folder expands in the left pane to show what's inside. If we click on the minus (-) sign then the folders under My Documents will become hidden again. |
|
||
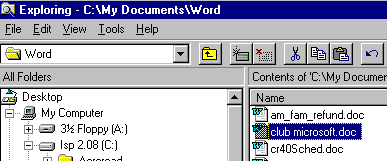
Clicking in the left pane on the folder we want brings up in the right pane a list of the folders and files that it contains. |
|
||
|
|||
|
4. Find the disk drive you want to copy the file TO. (See Alternate Method 4a) |
|||
|
|
||
|
|||
|
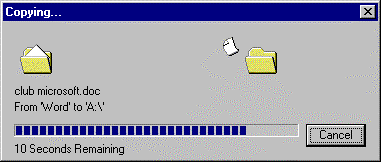
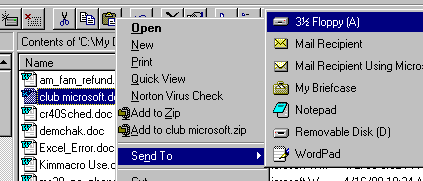
5. Drag the file and drop it on the disk drive. |
|||
|
|
||
|
|||
|
|
||
|
See Important Notes below on the Copy process.
|
|||
![]()
|
|
|
|
|
|
See
Important Notes below on the Copy process.
![]()
II. Copying FROM a floppy disk back to the Hard Drive
|
1. Launch Windows Explorer by one of the following 2 methods: |
|||||
If you have a Windows Explorer icon on your desktop, double-click the Windows Explorer Icon or |
|
||||
. Select Start / Programs / Windows Explorer |
|
||||
|
2. The Windows Explorer Screen will Open |
|||||
|
|
||||
|
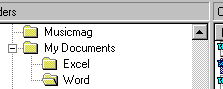
3. Navigate down through the folders and find the folder where you want to copy the file to. |
|||||
. If we are looking in the My Documents directory, we click on the plus (+) sign to see what is below. The folder expands in the left pane to show what's inside. If we click on the minus (-) sign then the folders under My Documents will become hidden again. |
|
||||
. Clicking in the left pane on the folder we want brings up in the right pane a list of the folders and files that it contains. |
|
||||
|
|||||
|
4. Find your file on the floppy drive and select it. |
|||||
|
|
||||
|
|||||
|
5. Scroll the left pane to the folder you want to copy the file TO. |
|||||
|
|
||||
|
|||||
|
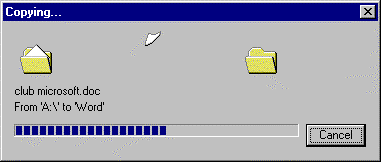
6. Drag the file and drop it on the folder. |
|||||
|
|
||||
|
|||||
|
|
||||
See
Important Notes below on the Copy process.
![]()
1. If you make a mistake and are not sure where your file or folder went, immediately hit CTRL-Z (hold the CTRL key down and press Z). This is the "undo" function, and should put things back the way they were before the last thing you did.
2. If you are not sure where on the disk your file is, you can use the Windows 95 Find function to find your file. You must know either the name of the file or some unique text that is in of the file. See How to Find Files.
3. You can select and copy several files at a time. When the files are showing on the right pane of Windows Explorer, select the first file you want to copy (by clicking the left mouse button once on it). Now:
| If you want to select a continuous range of filenames, hold down the SHIFT key and click on the last filename in the list that you want to select. The first, last, and all files in between will be selected (highlighted). | |
| If you want to select files which are non continuous in the list, hold down the CTRL key and click on each file you want. It will become selected (highlighted). If you make a mistake, with the CTRL key still held down, click again on the file that was highlighted by mistake and it will become deselected. | |
| If you want all the files in the folder, hold down the CTRL key and press the letter a (for All). |
4. If you are dragging a file from one location to another on the SAME disk drive, by default it is MOVED and not COPIED. Therefore, it will be removed from its original location and placed in the new location. If you want to COPY it instead (leaving it in both locations), drag with the right mouse button, and select Copy when you drop the file in its new location.
5. If you are dragging a file from one location to another on DIFFERENT disk drives, by default it is COPIED and not MOVED. Therefore, it will be not be removed from its original location, but will end up in both locations. If you want to MOVE it instead (removing it in from its original location), drag with the right mouse button, and select Move when you drop the file in its new location.